const std = @import("std");
const Socket = std.Io.net.Socket;
const Protocol = std.Io.net.Protocol;

pub const Server = struct {
    host: []const u8,
    port: u16,
    addr: std.Io.net.IpAddress,
    io: std.Io,

    pub fn init(io: std.Io) !Server {
        const host: []const u8 = "127.0.0.1";
        const port: u16 = 3490;
        const addr = try std.Io.net.IpAddress.parseIp4(
            host, port
        );

        return .{.host=host, .port=port, .addr=addr, .io=io};
    }

    pub fn listen(self: Server) !std.Io.net.Server {
        std.debug.print("Server Addr: {s}:{any}\n", .{self.host, self.port});
        return try self.addr.listen(
            self.io,
            .{.mode=Socket.Mode.stream, .protocol=Protocol.tcp}
        );
    }
};7 Project 2 - Building a HTTP Server from scratch
In this chapter, I want to implement a new small project with you. This time, we are going to implement a basic HTTP Server from scratch.
The Zig Standard Library already have a HTTP Server implemented, which is available at std.http.Server. But again, our objective here in this chapter, is to implement it from scratch. So we can’t use this server object available from the Zig Standard Library.
7.1 What is a HTTP Server?
First of all, what is a HTTP Server? A HTTP server, as any other type of server, is essentially a program that runs indefinitely, on an infinite loop, waiting for incoming connections from clients. Once the server receives an incoming connection, it will accept this connection, and it will send messages back-and-forth to the client through this connection.
But the messages that are transmitted inside this connection are in a specific format. They are HTTP messages (i.e., messages that use the HTTP Protocol specification). The HTTP Protocol is the backbone of the modern web. The world wide web as we know it today, would not exist without the HTTP Protocol.
So, Web servers (which is just a fancy name to HTTP Servers) are servers that exchange HTTP messages with clients. And these HTTP servers and the HTTP Protocol specification are essential to the operation of the world wide web today.
That is the whole picture of the process. Again, we have two subjects involved here, a server (which is a program that is running indefinitely, waiting to receive incoming connections), and a client (which is someone that wants to connect to the server, and exchange HTTP messages with it).
You may find the material about the HTTP Protocol available at the Mozilla MDN Docs1 , a great resource for you to also look at. It gives you a great overview on how HTTP works, and what role the server plays in this matter.
7.2 How a HTTP Server works?
Imagine a HTTP Server as if it were the receptionist of a large hotel. In a hotel, you have a reception, and inside that reception there is a receptionist waiting for customers to arrive. A HTTP Server is essentially a receptionist that is indefinitely waiting for new customers (or, in the context of HTTP, new clients) to arrive in the hotel.
When a customer arrives at the hotel, that customer starts a conversation with the receptionist. He tells the receptionist how many days he wants to stay at the hotel. Then, the receptionist search for an available apartment. If there is an available apartment at the moment, the customer pays the hotel fees, then, he gets the keys to the apartment, and then, he goes to the apartment to rest.
After this entire process of dealing with the customer (searching for available apartments, receiving payment, handing over the keys), the receptionist goes back to what he was doing earlier, which is to wait. Wait for new customers to arrive.
That is, in a nutshell, what a HTTP Server do. It waits for clients to connect to the server. When a client attempts to connect to the server, the server accepts this connection, and it starts to exchange messages with the client through this connection. The first message that happens inside this connection is always a message from the client to the server. This message is called the HTTP Request.
This HTTP Request is a HTTP message that contains what the client wants from the server. It is literally a request. The client that connected to the server is asking this server to do something for him.
There are different “types of request” that a client can send to a HTTP Server. But the most basic type of request, is when a client ask to the HTTP Server to serve (i.e., to send) some specific web page (which is a HTML file) to him. When you type google.com in your web browser, you are essentially sending a HTTP Request to Google’s HTTP servers. This request is asking these servers to send the Google webpage to you.
Nonetheless, when the server receives this first message, the HTTP Request, it analyzes this request, to understand: who the client is? What he wants the server to do? This client has provided all the necessary information to perform the action that he asked? Etc.
Once the server understands what the client wants, he simply perform the action that was requested, and, to finish the whole process, the server sends back a HTTP message to the client, informing if the action performed was successful or not, and, at last, the server ends (or closes) the connection with the client.
This last HTTP message sent from the server to the client, is called the HTTP Response. Because the server is responding to the action that was requested by the client. The main objective of this response message is let the client know if the action requested was successful or not, before the server closes the connection.
7.3 How a HTTP server is normally implemented?
Let’s use the C language as an example. There are many materials teaching how to write a simple HTTP server in C code, like Yu (2023), or Weerasiri (2023), or Meehan (2021). Having this in mind, I will not show C code examples here, because you can find them on the internet. But I will describe the theory behind the necessary steps to create such HTTP server in C.
In essence, we normally implement a HTTP server in C by using a TCP socket, which involves the following steps:
- Create a TCP socket object.
- Bind a name (or more specifically, an address) to this socket object.
- Make this socket object to start listening and waiting for incoming connections.
- When a connection arrive, we accept this connection, and we exchange the HTTP messages (HTTP Request and HTTP Response).
- Then, we simply close this connection.
A socket object is essentially a channel of communication. You are creating a channel where people can send messages through. When you create a socket object, this object is not binded to any particular address. This means that with this object you have a representation of a channel of communication in your hands. But this channel is not currently available, or, it is not currently accessible, because it does not have a known address where you can find it.
That is what the “bind” operation do. It binds a name (or more specifically, an address) to this socket object, or, this channel of communication, so that it becomes available, or, accessible through this address. While the “listen” operation makes the socket object to listen for incoming connections in this address. In other words, the “listen” operation makes the socket wait for incoming connections.
Now, when a client actually attempts to connect to the server through the socket address that we have specified, in order to establish this connection with the client, the socket object needs to accept this incoming connection. Thus, when we accept an incoming connection, the client and the server become connected to each other, and they can start reading or writing messages into this established connection.
After we receive the HTTP Request from the client, analyze it, and send the HTTP Response to the client, we can then close the connection, and end this communication.
7.4 Implementing the server - Part 1
7.4.1 Creating the server object
Let’s begin by writing the code responsible for listening and accepting incoming connections to our server. Just to make things shorter, I will write this code inside a separate Zig module, named server.zig.
Now, we essentially need to create a TCP socket object in our code. On previous versions of this book, we’ve decided to create such TCP socket through the the std.posix.socket() function, from the Zig Standard Library. But, with the introduction of the new IO interface in Zig 0.16, this function fit’s weird on the new std.Io.net.Stream API.
Because of that, I will take a different route this time. In summary, we are going to create a TCP socket through the listen() method from std.Io.net.IpAddress2. Then, with this TCP socket represented by the std.Io.net.Server type, we use the accept() method to establish the connection between our server and the client. Through this “connection object” that we get from accept() we get access to a stream, from which we can exchange messages between the server and the client.
As I mentioned earlier in Section 7.3, every socket object that we create represents a communication channel, and we need to bind this channel to a specific address. An “address” is defined as an IP address, or, more specifically, an IPv4 address3. Every IPv4 address is composed by two components. The first component is the host, which is a sequence of 4 numbers separated by dot characters (.) that identifies the machine used. While the second component is a port number, which identifies the specific door, or, the specific port to use in the host machine.
The sequence of 4 numbers (i.e., the host) identifies the machine (i.e., the computer itself) where this socket will live in. Every computer normally have multiple “doors” available inside of him, because this allows the computer to receive and work with multiple connections at the same time. He simply use a single door for each connection. So the port number, is essentially a number that identifies the “door” in the computer that the socket will use to receive incoming connections.
To make things simpler, I will use an IP address that identifies our current machine in this example. This means that, our socket object will reside on the same computer that we are currently using (this is also known as the “localhost”) to write this Zig source code. By convention, the IP address that identifies the “localhost”, which is the current machine we are using, is the IP 127.0.0.1. So, that is the IP address we are going to use in our server.
Now, we need to decide which port number to use. By convention, there are some port numbers that are reserved, meaning that, we cannot use them for our own purposes, like the port 22 (which is normally used for SSH connections). For TCP connections, which is our case here, a port number is a 16-bit unsigned integer (type u16 in Zig), thus ranging from 0 to 65535 (Wikipedia 2024). So, we can choose a number from 0 to 65535 for our port number. In the example of this book, I will use the port number 3490 (just a random number).
All of this process and steps that we’ve described are concentrated inside our own custom struct called Server, which is exposed below. Notice that we create a new std.Io.net.IpAddress object inside this struct. We also create our std.Io.net.Server object through the listen() method from our IP address object.
7.4.2 Listening and receiving connections
Remember that our Server struct declaration that we’ve built in Section 7.4.1 is inside a Zig module named server.zig. This is why I have imported this module into our main module (main.zig) in the example below, to access our Server struct.
Now, the socket stored inside our Server object needs to start listening and accepting new connections. We can do that by calling the method listen() from it, and then, calling the accept() method from the result. If you run the main module exposed below, you will notice that the program never ends. It just keeps stuck.
This happens, because the program is waiting for something to happen. It’s waiting for someone to try to connect to the address (127.0.0.1:3490) where the server is running and listening for incoming connections. This is what the listen() method do, it makes the socket to be active waiting for someone to connect.
On the other side, the accept() method is the function that establishes the connection when someone tries to connect to the socket. This means that, the accept() method returns a new connection object as a result. And you can use this connection object to read or write messages from or to the client. For now, we are not doing anything with this connection object. But we are going to use it in the next section.
const std = @import("std");
const Server = @import("server.zig").Server;

pub fn main(init: std.process.Init) !void {
    const io = init.io;
    const server = try Server.init(io);
    var listening = try server.listen();
    const connection = try listening.accept(io);
    defer connection.close(io);
}
This code example allows one single connection. In other words, the server will wait for one incoming connection, and as soon as the server is done with this first connection that it establishes, the program ends, and the server stops.
This is not the norm in the real world. Most people that write a HTTP server like this, usually put the accept() method inside a while (infinite) loop, where if a connection is created with accept(), a new thread of execution is created to deal with this new connection and the client. That is, real-world examples of HTTP Servers normally rely on parallel computing to work.
With this design, the server simply accepts the connection, and the whole process of dealing with the client, and receiving the HTTP Request, and sending the HTTP Response, all of this is done in the background, on a separate execution thread.
So, as soon as the server accepts the connection, and creates the separate thread, the server goes back to what he was doing earlier, which is to wait indefinitely for a new connection to accept. Having this in mind, the code example exposed above, is a server that serves only a single client. Because the program terminates as soon as the connection is accepted.
7.4.3 Reading the message from the client
Now that we have a connection established, i.e., the connection object that we created through the accept() function, we can now use this connection object to read any messages that the client send to our server. But we can also use it to send messages back to the client.
The basic idea is, if we write any data into this connection object, then, we are sending data to the client, and if we read the data present in this connection object, then, we are reading any data that the client sent to us, through this connection object. So, just have this logic in mind. “Read” is for reading messages from the client, and “write” is to send a message to the client.
Remember from Section 7.2 that, the first thing that we need to do is to read the HTTP Request sent by the client to our server. Because it is the first message that happens inside the established connection, and, as a consequence, it is the first thing that we need to deal with.
That is why, I’m going to create a new Zig module in this small project, named request.zig to keep all functions related to the HTTP Request together. Then, I will create a new function named read_request() that will use our connection object to read the message sent by the client, which is the HTTP Request.
You can see below that our read_request() function receives three inputs. The io argument should receive the IO backend that we want to use in our IO operations. The conn argument receives the connection object that we generated through the accept() method. While the buffer argument receives the buffer object in which we are going to store the request that the client have sent to our server.
const std = @import("std");
const Stream = std.Io.net.Stream;

pub fn read_request(io: std.Io, conn: Stream, buffer: []u8) !void {
    var recv_buffer: [1024]u8 = undefined;
    var reader = conn.reader(io, &recv_buffer);
    const reader_interface = &reader.interface;
    var start_index: usize = 0;
    for (0..5) |_| {
        const len = try read_next_line(reader_interface, buffer, start_index);
        start_index += len;
    }
}

fn read_next_line(reader: *std.Io.Reader, buffer: []u8, start_index: usize) !usize {
    const next_line = try reader.takeDelimiterInclusive('\n');
    @memcpy(
        buffer[start_index..(start_index + next_line.len)],
        next_line[0..],
    );
    return next_line.len;
}
So, the read_request() function essentially receives a connection object as input, which is represented by an IO stream object, then, it reads the HTTP request sent by the client by “reading data from the IO stream”, and saves this message into this buffer object that we have provided as input.
In order to do that, I first create a reader object from the IO stream object. Then, I call the takeDelimiterInclusive() method of this reader object, together with @memcpy(), to effectively read the next line of data from the stream. The for loop present in read_request() repeats this process 6 times, so, we are effectively reading the 6 first lines of the HTTP Request, and saving this data into the buffer object that we’ve created earlier.
7.5 Looking at the current state of the program
I think now is a good time to see how our program is currently working. Shall we? So, the first thing I will do is to update the main.zig module in our small Zig project, so that the main() function call this new read_request() function that we have just created. I will also add a print statement at the end of the main() function, just so that you can see what the HTTP Request that we have just loaded into the buffer object looks like.
Also, I’m creating the buffer object (request_buffer) in the main() function, which will be responsible for storing the message sent by the client, and, I’m also using @memset() to initialize the entire buffer object to zero. This is important to make sure that we don’t have uninitialized memory in this object. Because uninitialized memory may cause undefined behaviour in our program.
const std = @import("std");
const Request = @import("request.zig");
const Server = @import("server.zig").Server;

pub fn main(init: std.process.Init) !void {
    const io = init.io;
    const server = try Server.init(io);
    var listening = try server.listen();
    const connection = try listening.accept(io);
    defer connection.close(io);

    var request_buffer: [1000]u8 = undefined;
    @memset(request_buffer[0..], 0);
    try Request.read_request(
        io,
        connection,
        request_buffer[0..]
    );

    std.debug.print("{s}\n", .{request_buffer});
}
Now, I’m going to execute this program, with the run command from the zig compiler. But remember, as we sad earlier, as soon as I execute this program, it will hang indefinitely, because the program is waiting for a client trying to connect to the server.
More specifically, the program will pause at the line with the accept() call. As soon as a client try to connect to the server, then, the execution will “unpause”, and the accept() function will finally be executed to create the connection object that we need, and the remaining of the program will run.
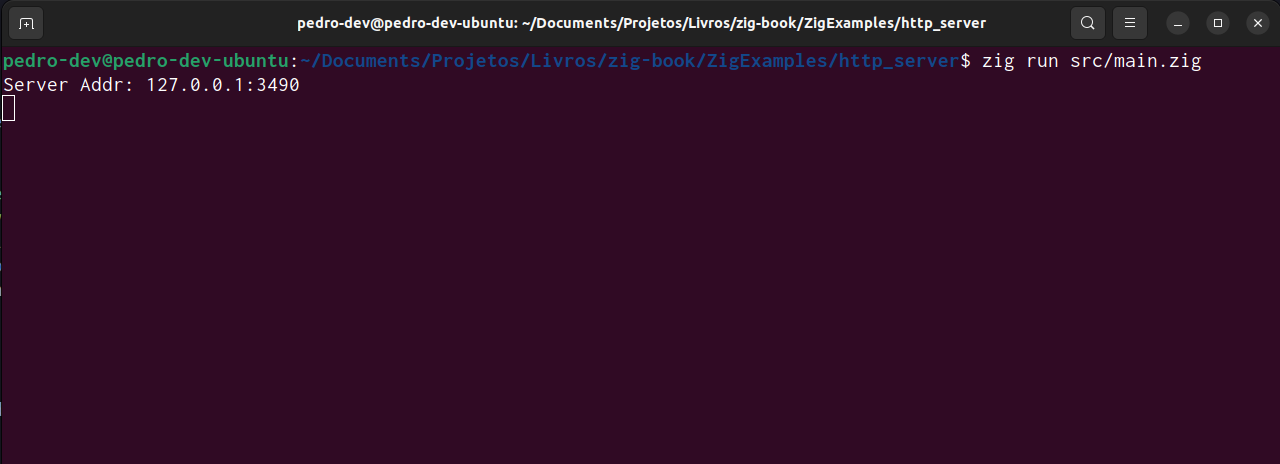
You can see that in Figure 7.1. The message Server Addr: 127.0.0.1:3490 is printed to the console, and the program is now waiting for an incoming connection.
We can finally try to connect to this server, and there are several ways we can do this. For example, we could use the following Python script:
import requests
requests.get("http://127.0.0.1:3490")
Or, we could also open any web browser of our preference, and type the URL localhost:3490. OBS: localhost is the same thing as the IP 127.0.0.1. When you press enter, and your web browser go to this address, first, the browser will probably print a message saying that “this page isn’t working”, and, then, it will probably change to a new message saying that “the site can’t be reached”.
You get these “error messages” in the web browser, because it got no response back from the server. In other words, when the web browser connected to our server, it did send the HTTP request through the established connection. Then, the web browser was expecting to receive a HTTP response back, but it got no response from the server (we didn’t implemented the HTTP Response logic yet).
But that is okay. We have achieved the result that we wanted for now, which is to connect to the server, and see the HTTP request that was sent by the web browser (or by the Python script) to the server.
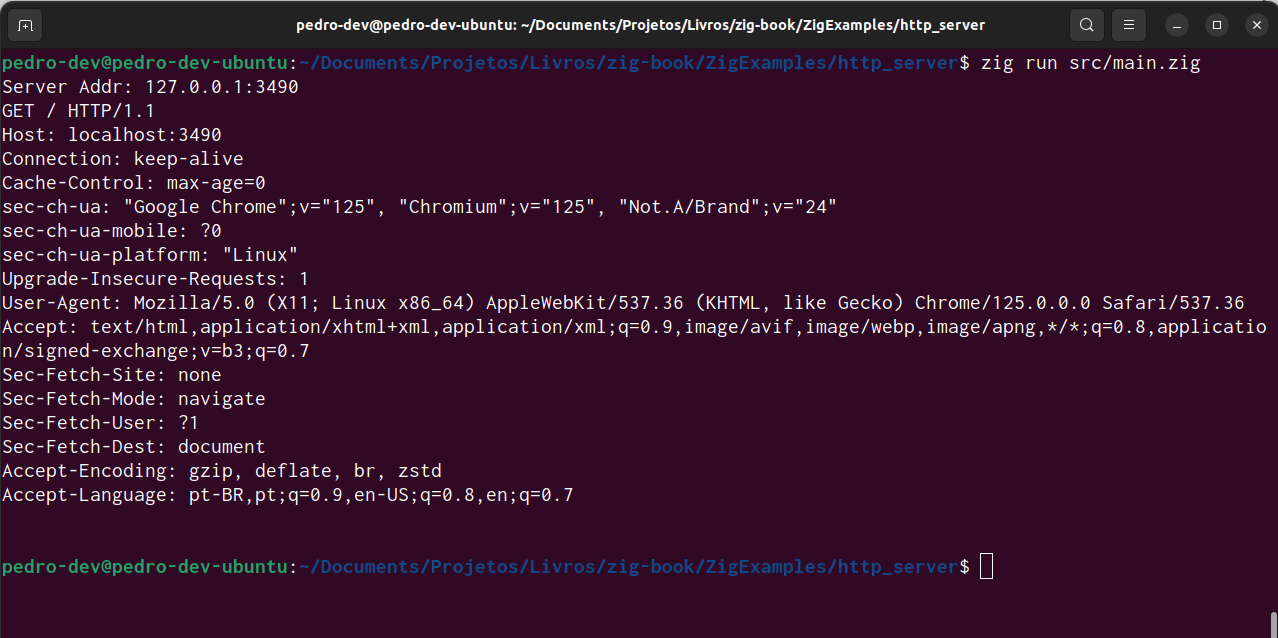
If you comeback to the console that you left open when you have executed the program, you will see that the program finished its execution, and, a new message is printed in the console, which is the actual HTTP request message that was sent by the web browser to the server.
Since we are only reading the first 6 lines of the HTTP request in our code, this program might not print the entire HTTP request message to you. That will depend on how big the HTTP request message was. You can see the HTTP request printed in Figure 7.2.
7.6 Learning about Enums in Zig
Enums structures are available in Zig through the enum keyword. An enum (short for “enumeration”) is a special structure that represents a group of constant values. So, if you have a variable which can assume a short and known set of values, you might want to associate this variable to an enum structure, to make sure that this variable only assumes a value from this set.
A classic example for enums are primary colors. If for some reason, your program needs to represent one of the primary colors, you can create an enum that represents one of these colors. In the example below, we are creating the enum PrimaryColorRGB, which represents a primary color from the RGB color system. By using this enum, I am guaranteed that the acolor object for example, will contain one of these three values: RED, GREEN or BLUE.
const PrimaryColorRGB = enum {
    RED, GREEN, BLUE
};
const acolor = PrimaryColorRGB.RED;
_ = acolor;
If for some reason, my code tries to save in acolor, a value that is not in this set, I will get an error message warning me that a value such as “MAGENTA” do not exist inside the PrimaryColorRGB enum. Then I can easily fix my mistake.
const acolor = PrimaryColorRGB.MAGENTA;e1.zig:5:36: error: enum 'PrimaryColorRGB' has
no member named 'MAGENTA':
const acolor = PrimaryColorRGB.MAGENTA;
^~~~~~~Behind the hood, enums in Zig work the same way that enums work in C. Each enum value is essentially represented as an integer. The first value in the set is represented as zero, then, the second value is one, … etc.
One thing that we are going to learn in the next section is that enums can have methods in them. Wait… What? This is amazing! Yes, enums in Zig are similar to structs, and they can have private and public methods inside them.
7.7 Implementing the server - Part 2
Now, on this section, I want to focus on parsing the HTTP Request that we received from the client. However, to effectively parse a HTTP Request message, we first need to understand its structure. In summary, a HTTP Request is a text message that is divided into 3 different sections (or parts):
- The top-level header indicating the method of the HTTP Request, the URI, and the HTTP version used in the message.
- A list of HTTP Headers.
- The body of the HTTP Request.
7.7.1 The top-level header
The first line of text in a HTTP Request always come with the three most essential information about the request. These three key attributes of the HTTP Request are separated by a simple space in this first line of the request. The first information is the HTTP method that is being used in the request, second, we have the URI to which this HTTP Request is being sent to, and third, we have the version of the HTTP protocol that is being used in this HTTP Request.
In the snippet below, you can find an example of this first line in a HTTP Request. First, we have the HTTP method of this request (GET). Many programmers refer to the URI component (/users/list) as the “API endpoint” to which the HTTP Request is being sent to. In the context of this specific request, since it’s a GET request, you could also say that the URI component is the path to the resource we want to access, or, the path to the document (or the file) that we want to retrieve from the server.
GET /users/list HTTP/1.1Also, notice that this HTTP Request is using the version 1.1 of the HTTP protocol, which is the most popular version of the protocol used in the web.
7.7.2 The list of HTTP headers
Most HTTP Requests also include a section of HTTP Headers, which is just a list of attributes or key-value pairs associated with this particular request. This section always comes right after the “top-level header” of the request.
For our purpose in this chapter, which is to build a simple HTTP Server, we are going to ignore this section of the HTTP Request, for simplicity. But most HTTP servers that exist in the wild parses and use these HTTP headers to change the way that the server responds to the request sent by the client.
For example, many requests we encounter in the real-world comes with a HTTP header called Accept. In this header, we find a list of MIME types4. This list indicates the file formats that the client can read, or parse, or interpret. In other words, you also interpret this header as the client saying the following phrase to the server: “Hey! Look, I can read only HTML documents, so please, send me back a document that is in a HTML format.”.
If the HTTP server can read and use this Accept header, then, the server can identify which is the best file format for the document to be sent to the client. Maybe the HTTP server have the same document in multiple formats, for example, in JSON, in XML, in HTML and in PDF, but the client can only understand documents in the HTML format. That is the purpose of this Accept header.
7.7.3 The body
The body comes after the list of HTTP headers, and it’s an optional section of the HTTP Request, meaning that, not all HTTP Requests will come with a body in them. For example, every HTTP Request that uses the GET method usually does not come with a body.
Because a GET request is used to request data, instead of sending it to the server. So, the body section is more related to the POST method, which is a method that involves sending data to the server, to be processed and stored.
Since we are going to support only the GET method in this project, it means that we also do not need to care about the body of the request.
7.7.4 Creating the HTTP Method enum
Every HTTP Request comes with a explicit method. The method used in a HTTP Request is identified by one these words:
- GET;
- POST;
- OPTIONS;
- PATCH;
- DELETE;
- and some other methods.
Each HTTP method is used for a specific type of task. The POST method for example is normally used to post some data into the destination. In other words, it’s used to send some data to the HTTP server, so that it can be processed and stored by the server.
As another example, the GET method is normally used to get content from the server. In other words, we use this method whenever we want the server to send some content back to us. It can be any type of content. It can be a web page, a document file, or some data in a JSON format.
When a client sends a POST HTTP Request, the HTTP Response sent by the server normally have the sole purpose of letting the client know if the server processed and stored the data successfully. In contrast, when the server receives a GET HTTP Request, then, the server sends the content that the client asked for in the HTTP Response itself. This demonstrates that the method associated with the HTTP Request changes a lot on the dynamics and the roles that each party plays in the whole process.
Since the HTTP method of the HTTP Request is identified by this very small and specific set of words, it would be interesting to create an enum structure to represent a HTTP method. This way, we can easily check if the HTTP Request we receive from the client is a HTTP method that we currently support in our small HTTP server project.
The Method structure below represents this enumeration. Notice that, for now, only the GET HTTP method is included in this enumeration. Because, for the purpose of this chapter, I want to implement only the GET HTTP method. That is why I am not including the other HTTP methods in this enumeration.
pub const Method = enum { GET };Now, I think we should add two methods to this enum structure. One method is is_supported(), which will be a function that returns a boolean value, indicating if the input HTTP method is supported or not by our HTTP Server. The other is init(), which is a constructor function that takes a string as input, and tries to convert it into a Method value.
But in order to build these functions, I will use a functionality from the Zig Standard Library, called StaticStringMap(). This function allows us to create a simple map from strings to enum values. In other words, we can use this map structure to map a string to the respective enum value. To some extent, this specific structure from the standard library works almost like a “hashtable” structure, and it’s optimized for small sets of words, or, small sets of keys, which is our case here. We are going to talk more about hashtables in Zig in Section 11.2.
To use this “static string map” structure, you have to import it from the std.static_string_map module of the Zig Standard Library. Just to make things shorter and easier to type, I am going to import this function through a different and shorter name (Map).
With Map() imported, we can just apply this function over the enum structure that we are going to use in the resulting map. In our case here, it’s the Method enum structure that we declared at the last code example. Then, I call the initComptime() method with the map, i.e., the list of key-value pairs that we are going to use.
You can see in the example below that I wrote this map using multiple anonymous struct literals. Inside the first (or “top-level”) struct literal, we have a list (or a sequence) of struct literals. Each struct literal in this list represents a separate key-value pair. The first element (or the key) in each key-value pair should always be a string value. While the second element should be a value from the enum structure that you have used inside the Map() function.
const std = @import("std");
pub const Method = enum { GET };
const Map = std.static_string_map.StaticStringMap;
const MethodMap = Map(Method).initComptime(.{
    .{ "GET", Method.GET },
});
Therefore, the MethodMap object is basically a std::map object from C++, or, a dict object from Python. You can retrieve (or get) the enum value that corresponds to a particular key, by using the get() method from the map object. This method returns an optional value, so, the get() method might result in a null value.
We can use this in our advantage to detect if a particular HTTP method is supported or not in our HTTP server. Because, if the get() method returns null, it means that it did not found the method that we provided inside the MethodMap object, and, as a consequence, this method is not supported by our HTTP server.
The init() method below, takes a string value as input, and then, it simply passes this string value to the get() method of our MethodMap object. As consequence, we should get the enum value that corresponds to this input string.
Notice in the example below that, the init() method returns either an error (which might happen if the ? method returns unreacheable, checkout Section 6.4.3 for more details) or a Method object as result. Since GET is currently the only value in our Method enum structure, it means that, the init() method will most likely return the value Method.GET as result.
Also notice that, in the is_supported() method, we are using the optional value returned by the get() method from our MethodMap object. The if statement unwraps the optional value returned by this method, and returns true in case this optional value is a not-null value. Otherwise, it simply returns false.
const std = @import("std");
pub const Method = enum {
    GET,
    pub fn init(text: []const u8) !Method {
        return MethodMap.get(text).?;
    }
    pub fn is_supported(m: []const u8) bool {
        const method = MethodMap.get(m);
        if (method) |_| {
            return true;
        }
        return false;
    }
};
const Map = std.static_string_map.StaticStringMap;
const MethodMap = Map(Method).initComptime(.{
    .{ "GET", Method.GET },
});
7.7.5 Writing the parse request function
Now that we created the enum that represents our HTTP method, we should start to write the function responsible for actually parsing the HTTP Request.
The first thing we can do, is to write a struct to represent the HTTP Request. Take the Request struct below as an example. It contains the three essential information from the “top-level” header (i.e., the first line) in the HTTP Request.
const Request = struct {
    method: Method,
    version: []const u8,
    uri: []const u8,
    pub fn init(method: Method,
                uri: []const u8,
                version: []const u8) Request {
        return Request{
            .method = method,
            .uri = uri,
            .version = version,
        };
    }
};
The parse_request() function should receive a string as input. This input string contains the HTTP Request message, and the parsing function should read and understand the individual parts of this message.
Now, remember that for the purpose of this chapter, we care only about the first line in this message, which contains the “top-level header”, or, the three essential attributes about the HTTP Request, which are the HTTP method used, the URI and the HTTP version.
Notice that I use the function indexOfScalar() in parse_request(). This function from the Zig Standard Library returns the first index where the scalar value that we provide happens in a string. In this case, I’m looking at the first occurrence of the new line character (\n). Because once again, we care only about the first line in the HTTP Request message. This is the line where we have the three information that we want to parse (version of HTTP, the HTTP method and the URI).
Therefore, we are using this indexOfScalar() function to limit our parsing process to the first line in the message. It’s also worth mentioning that, the indexOfScalar() function returns an optional value. That is why I use the orelse keyword to provide an alternative value, in case the value returned by the function is a null value.
Since each of these three attributes are separated by a simple space, we could use the function splitScalar() from the Zig Standard Library to split the input string into sections by looking for every position that appears a simple space. In other words, this splitScalar() function is equivalent to the split() method in Python, or, the std::getline() function from C++, or the strtok() function in C.
When you use this splitScalar() function, you get an iterator as the result. This iterator have a next() method that you can use to advance the iterator to the next position, or, to the next section of the splitted string. Note that, when you use next(), the method not only advances the iterator, but it also returns a slice to the current section of the splitted string as result.
Now, if you want to get a slice to the current section of the splitted string, but not advance the iterator to the next position, you can use the peek() method. Both next() and peek() methods return an optional value, that is why I use the ? method to unwrap these optional values.
pub fn parse_request(text: []u8) Request {
    const line_index = std.mem.indexOfScalar(
        u8, text, '\n'
    ) orelse text.len;
    var iterator = std.mem.splitScalar(
        u8, text[0..line_index], ' '
    );
    const method = try Method.init(iterator.next().?);
    const uri = iterator.next().?;
    const version = iterator.next().?;
    const request = Request.init(method, uri, version);
    return request;
}
As I described in Section 1.8, strings in Zig are simply arrays of bytes in the language. So, you will find lots of excellent utility functions to work directly with strings inside this mem module from the Zig Standard Library. We have described some of these useful utility functions already in Section 1.8.5.
7.7.6 Using the parse request function
Now that we wrote the function responsible for parsing the HTTP Request, we can add the function call to parse_request() in the main() function of our program.
After that, is a good idea to test once again the state of our program. I execute this program again with the run command from the zig compiler, then, I use my web browser to connect once again to the server through the URL localhost:3490, and finally, the end result of our Request object is printed to the console.
A quick observation, since I have used the any format specifier in the print statement, the data members version and uri of the Request struct were printed as raw integer values. String data being printed as integer values is common in Zig, and remember, these integer values are just the decimal representation of the bytes that form the string in question.
In the result below, the sequence of decimal values 72, 84, 84, 80, 47, 49, 46, 49, and 13, are the bytes that form the text “HTTP/1.1”. And the integer 47, is the decimal value of the character /, which represents our URI in this request.
const std = @import("std");
const Request = @import("request.zig");
const Server = @import("server.zig").Server;

pub fn main(init: std.process.Init) !void {
    const io = init.io;
    const server = try Server.init(io);
    var listening = try server.listen();
    const connection = try listening.accept(io);
    defer connection.close(io);

    var request_buffer: [1000]u8 = undefined;
    @memset(request_buffer[0..], 0);
    try Request.read_request(
        io,
        connection,
        request_buffer[0..]
    );
    const request = Request.parse_request(request_buffer[0..]);
    std.debug.print("{any}\n", .{request});
}
request.Request{
.method = request.Method.GET,
.version = {72, 84, 84, 80, 47, 49, 46, 49, 13},
.uri = {47}
}7.7.7 Sending the HTTP Response to the client
In this last part, we are going to write the logic responsible for sending the HTTP Response from the server to the client. To make things simple, the server in this project will send just a simple web page containing the text “Hello world”.
First, I create a new Zig module in the project, named response.zig. In this module, I will declare just two functions. Each function corresponds to a specific status code in the HTTP Response. The send_200() function will send a HTTP Response with status code 200 (which means “Success”) to the client. While the send_404() function sends a response with status code 404 (which means “Not found”).
This is definitely not the most ergonomic and adequate way of handling the HTTP Response, but it works for our case here. We are just building toy projects in this book after all, therefore, the source code that we write do not need to be perfect. It just needs to work!
const std = @import("std");
const Stream = std.Io.net.Stream;

pub fn send_200(conn: Stream, io: std.Io) !void {
    const message = (
        "HTTP/1.1 200 OK\nContent-Length: 48"
        ++ "\nContent-Type: text/html\n"
        ++ "Connection: Closed\n\n<html><body>"
        ++ "<h1>Hello, World!</h1></body></html>"
    );
    var stream_writer = conn.writer(io, &.{});
    _ = try stream_writer.interface.write(message);
}

pub fn send_404(conn: Stream, io: std.Io) !void {
    const message = (
        "HTTP/1.1 404 Not Found\nContent-Length: 50"
        ++ "\nContent-Type: text/html\n"
        ++ "Connection: Closed\n\n<html><body>"
        ++ "<h1>File not found!</h1></body></html>"
    );
    var stream_writer = conn.writer(io, &.{});
    _ = try stream_writer.interface.write(message);
}
Notice that both functions receives the connection object as input, creates a writer object from this connection object, then, uses the write() method to write the HTTP Response message directly into this communication channel. As result, the party in the other side of the connection (i.e., the client), will receive such message.
Most real-world HTTP Servers will have a single function (or a single struct) to effectively handle the response. It gets the HTTP Request already parsed as input, and then, it tries to build the HTTP Response bit by bit, before the function sends it over the connection.
We would also have a specialized struct to represent a HTTP Response, and a lot of methods that would be used to build each part or component of the response object.
7.8 The end result
We can now, update once again our main() function to incorporate our new functions from the response.zig module. First, I need to import this module into our main.zig module, then, I add the function calls to send_200() and send_404().
Notice that I’m using if statements to decide which “response function” to call, based especially on the URI present in the HTTP Request. If the user asked for a content (or a document) that is not present in our server, we should respond with a 404 status code. But since we have just a simple HTTP server, with no real documents to send, we can just check if the URI is the root path (/) or not to decide which function to call.
Also, notice that I’m using the function std.mem.eql() from the Zig Standard Library to check if the string from uri is equal or not the string "/". We have described this function already in Section 1.8.5, so, comeback to that section if you are not familiar yet with this function.
const std = @import("std");
const Method = @import("request.zig").Method;
const Request = @import("request.zig");
const Response = @import("response.zig");
const Server = @import("server.zig").Server;

pub fn main(init: std.process.Init) !void {
    const io = init.io;
    const server = try Server.init(io);
    var listening = try server.listen();
    const connection = try listening.accept(io);
    defer connection.close(io);

    var request_buffer: [1000]u8 = undefined;
    @memset(request_buffer[0..], 0);
    try Request.read_request(
        io,
        connection,
        request_buffer[0..]
    );
    const request = Request.parse_request(request_buffer[0..]);
    if (request.method == Method.GET) {
        if (std.mem.eql(u8, request.uri, "/")) {
            try Response.send_200(connection, io);
        } else {
            try Response.send_404(connection, io);
        }
    }
}
Now that we adjusted our main() function, I can now execute our program, and see the effects of these last changes. First, I execute the program once again, with the run command of the zig compiler. The program will hang, waiting for a client to connect.
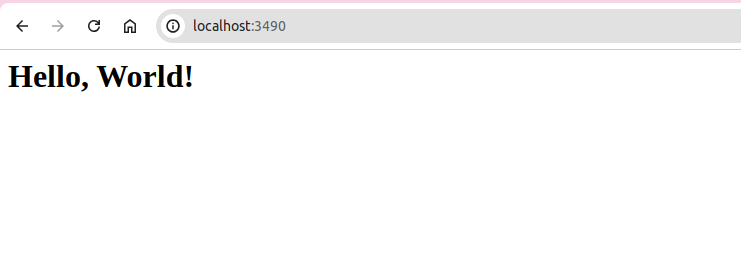
Then, I open my web browser, and try to connect to the server again, using the URL localhost:3490. This time, instead of getting some sort of an error message from the browser, you will get the message “Hello World” printed into your web browser. Because this time, the server sended the HTTP Response successfully to the web browser, as demonstrated by Figure 7.3.
https://developer.mozilla.org/en-US/docs/Web/HTTP/Overview.↩︎
https://ziglang.org/documentation/master/std/#std.Io.net.IpAddress.listen↩︎
It can be also an IPv6 address. But normally, we use a IPv4 address for that.↩︎